Kayak Hangers for Garage
Looking to optimize your garage space and keep your kayak safely stored away? Look no further! I’ve got all the information you need on kayak hangers for garages. With these handy storage solutions, you can easily hang your kayak up and out of the way, freeing up valuable floor space.
Kayak hangers are designed to securely hold your kayak vertically, preventing any damage or warping occurring when it’s stored horizontally. By utilizing the vertical space in your garage, you’ll have more room for other equipment and vehicles. Plus, hanging your kayak makes it easily accessible whenever you’re ready for an adventure on the water.
Types of Kayak Hangers
Let’s have a look at the types of kayak hangers:
Wall-Mounted Kayak Hangers
Wall-mounted kayak hangers are popular for many garage owners due to their space-saving design and easy installation. These hangers typically consist of sturdy brackets that attach securely to the wall, providing a reliable support system for your kayak. They often come with adjustable arms or hooks that can be customized to fit different sizes and shapes of kayaks.
One advantage of wall-mounted hangers is that they keep your kayak off the floor, protecting it from potential damage caused by accidental bumps or scratches. They also allow you to maximize vertical storage space in your garage, freeing up valuable floor areas for other equipment or vehicles.
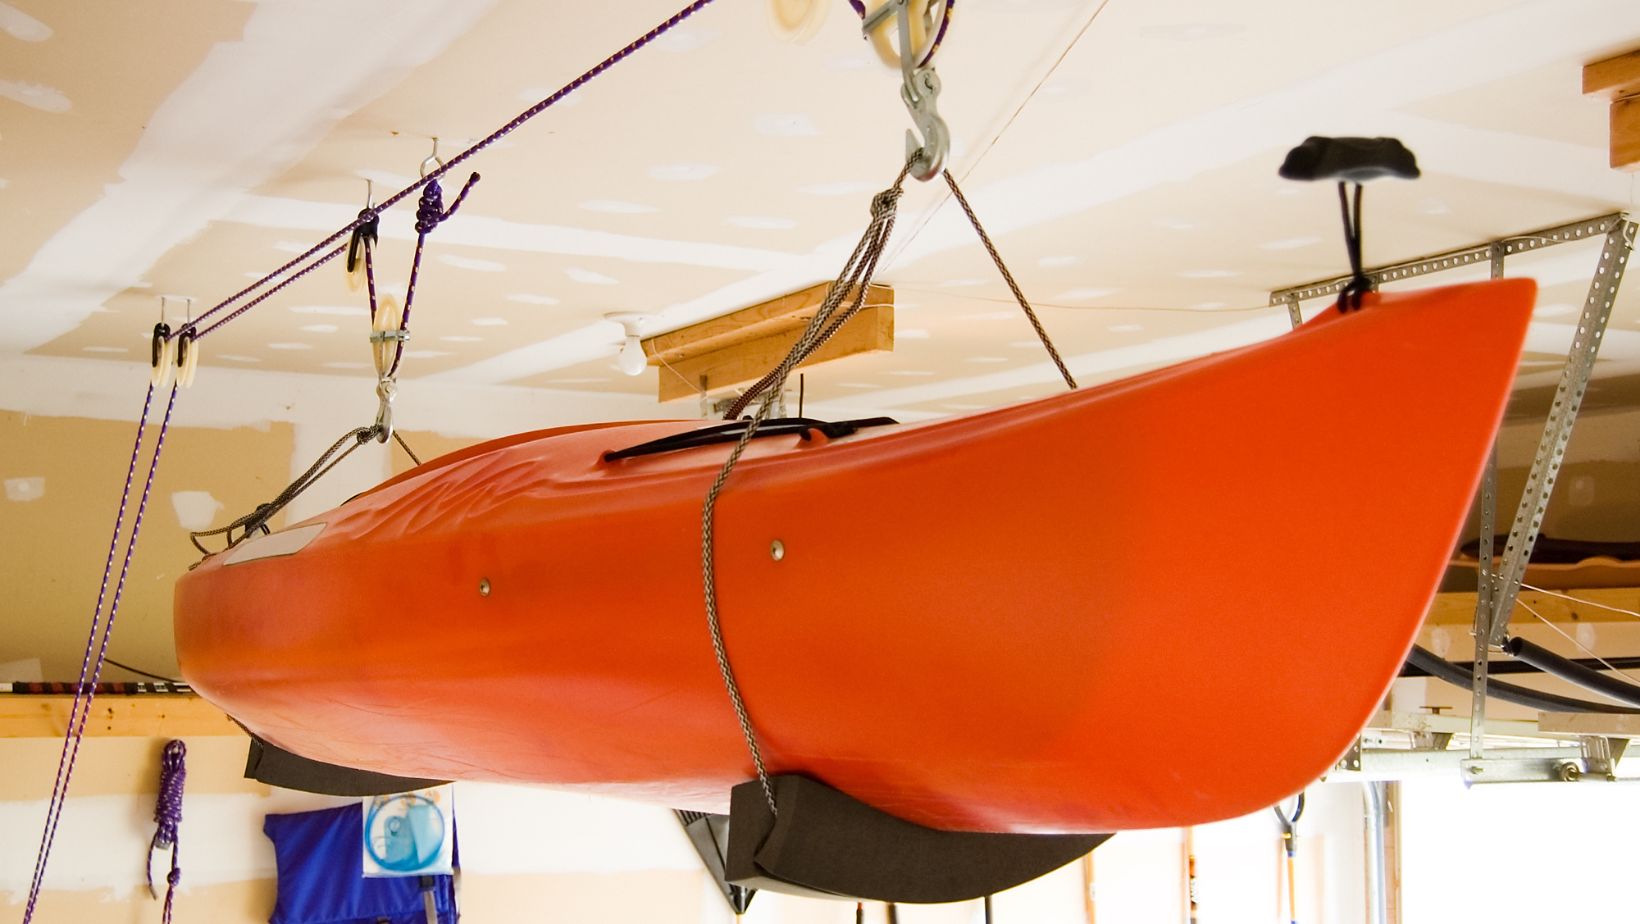
Ceiling-Mounted Kayak Hangers
If you want to utilize the overhead space in your garage, ceiling-mounted kayak hangers might be the perfect solution. These hangers are designed to suspend your kayak from the ceiling using strong ropes or straps, keeping it safely out of the way while still easily accessible.
Ceiling-mounted hangers are especially beneficial for those with limited wall space or who want to store multiple kayaks without taking up valuable floor area. They offer a secure storage option and can handle heavier loads thanks to their durable construction. However, it’s important to note that installing these hangers may require additional hardware and proper anchoring into ceiling joists for optimal stability.
Freestanding Kayak Hangers
For those who prefer flexible storage options, freestanding kayak hangers provide a convenient solution. These standalone racks typically feature adjustable arms or cradles that securely hold your kayak upright. They can be placed anywhere in your garage without drilling holes into walls or ceilings.
Freestanding hangers offer easy access to your kayak and allow you to move them around as needed. They are also ideal if you have limited wall or ceiling space or frequently use your kayak and need a storage solution that can be quickly adjusted. However, it’s important to ensure that the freestanding hanger you choose is sturdy enough to support the weight of your kayak and won’t tip over easily.
Installation Process for Kayak Hangers
The process can be quite straightforward when installing kayak hangers in your garage. Here’s a step-by-step guide to help you get started:
- Choose the Right Location:
- Look for an area in your garage with enough space to accommodate the length and width of your kayak.
- Ensure that the location is easily accessible, allowing you to store and retrieve your kayak conveniently.
- Gather the Necessary Tools:
- Before you begin, gather all the tools required for installation. This may include a drill, screws, a measuring tape, a level, and a stud finder.
- Measure and Mark:
- Use a measuring tape to determine the height you want to hang your kayak.
- Consider factors such as ceiling clearance and ease of reaching the kayak when marking the spot on your garage wall.
- Locate Wall Studs:
- To ensure secure installation, locate the wall studs using a stud finder.
- Mark each stud’s position on the wall with a pencil or masking tape.
- Attach Mounting Brackets:
- Using your drill and screws, attach mounting brackets to each marked stud.
- Make sure they are level and securely fastened.
- Hang Kayak Hangers:
- Depending on the type of hanger you have chosen (such as J-hooks or pulley systems), follow manufacturer instructions to hang them securely onto the mounting brackets.
- Test Stability:
- Once installed, carefully place your kayak onto the hangers.
- Gently shake or test its stability to ensure it is securely held.
By following these steps, you’ll have an organized storage solution for your kayak in no time! Always refer to manufacturer guidelines specific to your chosen hanger type for any additional instructions or safety considerations throughout the installation process.